Friday, December 24, 2010

Merry Christmas!!!

One last Blog post before Christmas!  The finale of our Holiday cooking is our huge batch of sugar cookies that we make every year on Christmas Eve.  I have backed away from all the different kinds of Christmas cookies that I used to make to concentrate on candy making, but I can't resist these fabulous soft and fun to make and eat goodies once a year.  This makes about 8-10 dozen cookies and takes the four of us about 2 hours to decorate.  By the end, we are all sick of cookies and sticky up to our elbows, but the cookies are so good they are usually gone within a few days.  The recipe is from a former family member, and we decorate with a variety of colored sugars and sprinkles.  This year I also found some intricate little sugar decorations at a cake shop, and we added them for a special little touch.

Soft Sugar Cookies
8.5 c flour
3 c sugar
4 t baking powder
2 t baking soda
2 t salt

Mix these together and rub in 1 lb butter or margarine.

1.5 c milk
1 T vinegar

Mix these and sit 10 minutes for milk to sour, add:

4 t vanilla
2 eggs,

mix these in with the milk, then add to the shortened dry ingredients a little at a time until completely mixed.  Chill overnight, then roll out to 1/4" thick and cut out shapes.  Bake at 325 for 15 minutes.  Cool, frost, and decorate.

Icing
1 stick butter
2 t vanilla
4 c powdered sugar
3 T milk

(actually, we used about 4 times this much icing)

Alternatively, you can decorate with sugar before baking and forget the icing.  My dad likes them this way, but this year my kids over ruled their Grandpa.


In addition to the traditional Christmas shapes we make crabs and lighthouses to symbolize our yearly trip to Chincoteague.  (i.e.  Sandy-Claws, the Christmas Crab) and other stuff to remind us of fun stuff we've done through the year.  This year the dinosaurs symbolize the time Melissa and Julia spent volunteering at the Carnegie Museum of Natural History summer camps, where Rebecca was also a camper.

Merry Christmas!!!!

Sunday, December 19, 2010

Christmas Gifts

Ok, now it's time for the big payoff.  You have spent tons of time slaving away on all those goodies and now you finally have an excuse to force people to eat them and tell you how fabulous they are.  Of course I am talking about Christmas.  I have spent a few minutes making some last-minute easy treats like chocolate mint spoons, and fluffernutter bars which are specifically for gift giving. 

The Chocolate Spoons are really super simple, but they make a cute addition to packages or gift baskets.  I used some leftover melting chocolate and dipped some red spoons in it then sprinkled with crushed candy canes.  These can be used to flavor coffee or hot chocolate, depending on the tastes of the recipient.  The Fluffernutter Bars were a last minute invention when I needed to use leftover chocolate from an encore batch of Marshmallow Elf Pops.  I spread some peanut butter and marshmallow fluff on seperate graham crackers, then put them together and dipped them in chocolate, then sprinkled with some festive jimmies. 


When you are forcing someone to eat your candy, you should probably put it in attractive packaging.  Every year I head to the dollar store in early November to stock up on baskets, treat bags, chenille stems (used to be called pipe cleaners) and any other inexpensive little festive boxes they might have.  This year they had tiny Christmas boxes in the shape of chinese food takeout containers.  We also make boxes out of scrabook paper.  It would take too long for me to describe how to do this, but it is really easy, and here's a link: http://www.wikihow.com/Fold-a-Paper-Box


One little tip though, cut a little strip off the paper on either side after step five for the bottom of the box so that it fits nicely inside the top nicely.  I buy one of the big stacks of the scrapbook paper and it lasts us about 3 or 4 christmases.  It makes a box about 4" square, and you can fit all kinds of goodies in there.


Arrange your homemade presents nicely in your dollar store basket or a bag and head off to distribute them.  So far this year, we have given baskets to my work-study students, Rebecca's baton teachers, and at church, the Sunday school teacher, choir director, and pastor.

Friday, December 10, 2010

Candied Pecans, Maple Butterscotch, and Chocolate Covered Marshmallow Pops

Each of these is and easy quick entry and each fills a special role in my Christmas preparedness routine. 

Spicy Candied Pecans

1 Pound Pecan Halves
1/2 c brown sugar
1/4c water
3T butter
2T Old Bay Seasoning or similar crab spices

Roast the pecan halves by spreading them out on a cookie sheet and baking for 10 minutes at 350F.

Meanwhile, combine the other ingredients in a saucepan and heat until boiling.  Boil 3 minutes.  Stir in the hot pecans and mix well.   Continue to boil until most of the liquid is gone.

Spread the sugared nuts on a wax paper lined cookie sheet and put back in the oven at 350F to roast for another 10 minutes. 

When the nuts come out of the oven, use a spatula to transfer them to a fresh waxed paper lined cookie sheet. This will separate them so that they don't stick together as they cool. 

Mix 3T sugar and 1t salt then sprinkle that over top of the cooling nuts.  This gives them a nice sweet sparkle along with the shine of the candy coating.

This one appeals to the men in my life.  I made it last year for the first time and my Dad was hooked immediately.  It's really easy and it's a different taste than anything you can buy in the grocery store.

Maple Butterscotch

I'm not going to repeat my recipe for butterscotch, but if you replace the butter rum flavor with maple flavor you will end up with the richness of buttery pancakes in a candy you can pop in at any time.

My basic theory is that anything that makes a good caramel will make a good butterscotch.  My next attempt will be orange.

Chocolate Covered Marshmallow Pops

This one we made for an event called Kids Helping Kids.  At Rebeca's school every year just before Christmas they set aside a day for the kids to have a fair where they sell treats and crafts to one another and the money is donated to local charities like Children's Hospital.  I like to have the kids involved in making the treats, so this year we expanded on Rebecca's chocolate hobby to make these little guys.  I do confess I used a lower grade chocolate for these, but you can be as fancy as you want.

Marshmallows
Lolly pop sticks
Melting chocolates
Sugar Eyes
Coating Wafers
White chocolate melted for glue

1)  We poked a lolly pop stick into each marshmallow, then dipped it into melted chocolate and placed upside down on waxed paper to cool.

2) We melted the white chocolate and used it as glue to attach a wafer hat and eyes.  Then we a attached a white sprinkle for a hat tassel. 

3) We will wrap these in pretty baggies and sell them for 50 cents.


They were originally intended to be Santa-ish but we decided they came out more like french elves.  Another case where my lack of being a perfectionist pays off!

Tuesday, November 23, 2010

Rebecca's New Hobby

I wanted to find a way to include Rebecca in my Holiday Candy Making Mania.  Julia is now 15 and Queen of all Things Hard Candy, and Rebecca at 10 needed to find her own fun way to be involved.  So I took some of my old hard candy molds which turned out to be a little impractical, either too large to eat or to complicated to pour, and let her use them to make painted chocolates. 

This is something that she can do on her own safely with the microwave, and she turns out beautiful and tasty additions to our holiday assortments.  It is moderately messy, but some scrubbing is a small price to pay for these fancy treats.

I purchased some good quality melting chocolate from Sam's Club in milk and white, and 3 colors of wafers from the grocery store.  The candy wafers are made specifically for this purpose.


Rebecca melts 5 candy wafers at a time in the microwave by stirring every 20 seconds until fully melted.  She then uses a paint brush to paint a design directly onto the mold.  She lets each color set before adding a new color.  After she is done painting the mold, she melts the high quality chocolate and pours it over the melted design.  For lollipops she adds a stick at this time.


After allowing the chocolates to set up , she pops them out of the molds. 


Since everybody loves chocolate, she doesn't want to waste any, so with the leftover melted chocolate she makes other treats like chocolate drizzled pretzels or chocolate dipped candy canes.


Rebecca is having a ball making these, and now the challenge is keeping her sisters from eating them all before Thanksgiving even gets here, let alone Christmas!

Sunday, November 21, 2010

Easy Potluck Appetizer: "BBQ Smokies"

When considering a potluck recipe, you should always consider the surroundings.  Take into account the weather, the other guests preferences, and the serving circumstances.  You probably wouldn't want to take hot bean soup to a Forth of July picnic for your 6-year old's baton troop, but it might be just the thing for a chilly tailgate lunch with the guys

One of my go-to recipes is one my grandma discovered during her time living in Florida.  She made it for my parents, who passed it on to me.  I have passed it on many times.

BBQ Smokies

1 lb smoked sausage (usually I use "Lil Smokies" the little smoked sausages, but they are a bit pricey, so sometimes I buy a ring of smoked sausage and cut it up.  Today, though, I used some Alligator Sausage that we brought home from our fall vacation)
1 can jellied cranberry sauce
1 jar chili sauce
1/4 c brown sugar
1 T lemon juice

Combine all ingredients except cooked sausage in a sauce pan and heat to melt. 


Stir in the sausage (make sure you cook it first if you use any kind of fresh sausage).


Pour into a crock pot and hold on warm. 

This is really easy and no one will be able to guess your recipe.  Also it appeals to every age and gender group.  I have taken this to tailgates, Easter dinners, bonfires, office lunches, etc.


Monday, November 15, 2010

Butterscotch!!!!

Anyone can try something new, I like to try old things. This weekend I dug out an old cookbook that used to belong to my George's grandmother, Nona.  I don't know if Nona ever made candy, but this book is full of great illustrations of pre-plastic candy making techniques.  In the book the butterscotch is poured onto greased marble and molded by something called "caramel bars"  then chopped up with a "candy hatchet".  I am once again very thankful for my molds and may "Pam". 


Here is what I did:


2  c sugar
3/4 c water
1/2 c corn syrup

Combine in saucepan and cook to 270F, stirring only until the sugar is dissolved.  Then add:

1/2 t salt
1/4 c honey
2 sticks butter, cut into chunks


IMAG0145

Cook to 310F, stirring constanly, then remove from heat.
IMAG0147


 After bubbling stops add 1 dram butter rum flavoring oil.  Pour into greased molds.  After setting up, break apart and dust with powdered sugar.


This was really easy and so good!  I am sure I will have to make at least another batch before christmas, and this will undoubtedly continue to be one of my regular candies. 

Note:  I edited this post a few days later to correct some things that caused me to end up with chewy caramels instead of hard butterscotch.  It's good though, so I will post that later!

A Hunk of Meat, a Can of Beer and a Crockpot

You thought this was going to be an X-rated post, didn't you?  Well, now that I have your attention hopefully you will read the rest. ;) There are so many things you can do with this combination!  Just yesterday I threw a pork roast in with a can of beer and cooked them all day.  Then I stringed the pork and added enough of the juice to cover, then put it in the fridge.  Tonight I will reheat the pulled pork, then pour off most of the liquid and replace with Sweet Baby Ray's BBQ sauce, and we will have Pulled Pork Sandwiches.  I will freeze the leftovers, and when I thaw them out I will add 2T taco seasoning and maybe some corn and salsa.  Place on a hot tortilla and melt in cheese and you have Pork Quesadillas.  You can also make Chicken Quesadillas the same way, just substitute chicken breast.


If you start with a beef roast, you can add BBQ sauce for Beef BBQ sandwiches, or you can add an envelope of onion soup mix and a tsp of Worcestershire sauce while cooking in the crock pot.  Then you will end up with French Dip Sandwiches.  Or you can make Pot Roast by roast + beer + beef bouillon + carrots, potatoes, onions and celery.  To make gravy, just remove the juice and thicken it with a little cornstarch before serving.

If you start with stew meat, you can make Beef Stew instead of Pot Roast  by just changing the meat and not making the gravy.   Or you can make Beef "Tips" and Noodles by adding mushrooms and bouillon, then thickening the juice and serving over noodles.  If you add mushrooms and onion soup mix, cook, then add sour cream and thicken, you will have Beef Stroganoff. 

I'm sure there are lots of other combinations but that's a start.


Dinner:  Pulled pork sandwich (see above)  Applesauce  and Fried
Baby Potatoes (see previous post)
And the best part is, it was all ready within 20 minutes of when I walked through the door!

Wednesday, November 10, 2010

Hard Candy

Now that November has settled in, I am acknowledging my next obsession.  Candy Making.  I love making candy, perhaps more than eating it.  The foundation of my candy making obsession is Hard Tack.  I remember making this candy with my mom as a kid, and now I make it with my kids, particularly, my middle daughter Julia.  Julia has progressed from standing on a chair as a toddler watching from a safe distance, to being my full partner in the process.  We now make 2 batches at a time and "race" to the "310" temp.  Along with Julia, our process has grown and evolved through the years.  We have gone from trying wacky flavors like cotton candy and pouring onto buttered cookie sheets to a sophisticated system of flavor mixes and breakaway molds.  The end result has been about 10 pounds each of a fruit mix and a spice mix for the last few years.  This year we will be adding a tropical mix, just for fun.

Before we start making candy, we make a chart with all the flavors and colors we plan on using.  That way we avoid duplicating colors within mixes.  For example, Tutti Fruiti is pink, while cherry is red. 

This year's fruit mix went like this:

Blackberry     Blue
Lime              Lt. Green
Tutti Fruiti      Pink (1 drop red)
Cherry           Red
Grape            Purple
Lemon           Yellow
Orange          Orange
Watermelon  Dark Green

We use the Lorann Oils recipe and flavorings with a few modifications.  I was watching Alton Brown the other night and as much as I love him I have to disagree with a few of his points too.  Primarily I adjust the color as the candy cooks, rather than waiting until it reaches 310, and I wait until boiling ceases altogether before adding flavor:

Basic Candy

2 c granulated sugar
2/3 c light corn syrup
3/4 c water

Combine these in a medium sauce pan with a thermometer and stir with a wooden spoon.  The wooden spoon for some reason helps keep the mixture from boiling over while the water boils out.  I didn't believe it either, but it works.  Adjust the color to the shade you want.  Boil, stirring occasionally, until the temp reaches 310F.  This is the hard crack stage in candy making.  There are lots of resources on the web to learn about this, so I won't go into the chemistry/physics.


Remove the thermometer, then allow the candy to stop boiling.  It will still be bubbly, but there will not be new bubbles when you stir when you get to the point we are looking for.  At this point, add the flavoring and stir with a silicone spatula, then pour into a greased candy mold which has been placed on a cookie sheet.


Allow the candy to cool and set, then break apart.  I resisted using the molds for years  because I like my old fashioned hard candy to look rustic, and I broke it apart by hand and this is certainly possible.  But a couple of years ago my friend Heather tried the molds and loved them, so it has been in the back of my mind.  This year I ordered my flavorings directly from Lorann, and they were selling the molds too  so I decided to give it a go.  My review is that they are awesome and cut the process time in half,  We didn't end up with little cuts all over our fingers like we do when we break the candy by hand.  We were able to make 8 batches of candy in about 2 1/2 hours, where before 4 or 5 were all we could manage in an entire day. 


After you break the candy apart, put it in a bowl and dust with powdered sugar.  Then place in a strainer and shake to remove the excess powdered sugar.  Store in an airtight container. It should last about 8 months, or until the humidity gets to high in your climate. 

Also, the leftover powdered sugar has little shards of colorful candy and you can use it for a dusting sugar for brownies or cookies or something. 

All in all, I wish I could say that the satisfaction I get from making this stuff is somehow related to my love of science.  There are certainly lots of interesting chemical and physical changes going on in those sugar molecules.  But really I think it's a more primal love of the shiny glassy colors that gets me.  I may have been a glass blower in a former life, or maybe a crow or a magpie.

Monday, November 1, 2010

Trifolate Orange Marmalade or I Swear this is the Last Canning Post for a While


One of the souvineers we brought home from our fall getaway was a small bag of what turned out to be trifolate oranges.  We found these growing in the garden of a historical mansion we were visiting.  The mansion was closed, but these exotic little fruit were perfectly ripe and waiting for me.  A stray docent happened by and told me to go ahead and take some, so I did.   The trifolate orange is a tiny hardy orange that grows on a small tree about 8-10 feet tall with lots of thorns.  It is commonly used for grafting stock and can withstand a certain amount of freezing, which is why we found it growing on the southern Maryland coast. 

In searching for something to do with my found treasures I learned that these are not true oranges, being from a diferent genus in the orange family, and that eating them raw can cause gastric distress.  They are recommended for making marmalade. 

I had never made marmalade before, but I was game to try.  First I used a carrot peeler to shave away the outer portion of most of the rinds of the oranges.  Then I attempted to peel and pulp the little guys.  Turns out they are packed with seeds, and a little juice, and a very little pulp.  So what I did was cut them open and squeeze out the juice and seeds, then put through the food press.  This left me with about 3/4 c of juice that tasted like the result of a mating between a grapefruit and a pine tree. 

Undaunted I decided to suplement my bitter/sour juice with an equal amount of orange juice and the pulp of 3 oranges.  I then chopped the peelings from the trifolates and one of the oranges and combined them with the juice/pulp and boiled for 5 minutes.  This I allowed to sit overnight in the fridge.  I don't know why it needs to sit, but the Ball Blue Book said to, so I did. 

The next day, I boiled the juice/pulp/peels with about a half package of pectin, then added and equal ammount of sugar and boiled for 3 minutes, then packed hot into hot jars and processed 5 minutes in a boiling water bath to seal.   This seems to have gelled, and the result is a very classy slightly bitter marmalade.

Sunday, October 31, 2010

Pictures


Rebecca Storing Apples


Rebecca Slicing Peppers to Freeze


Rebecca's creepy Pumpkin


Volunteer Squash


Squash Wrapped for Stoarage

The End of the Harvest

Halloween marks the end of the harvest here in  Western PA.  The small towns shift from harvest festivals to Christmas Light up nights and Holiday Craft Shows.  George and I have spent the weekend beginning to tighten things up for the winter.  He has pulled his beloved Tommato plants and  we made our final trip to our Farmer's Market, which closes today until next July. Most of the preserving I have written about up to now has been canning, but I also do some freezing and cellaring.

I dont't have a fruit cellar exactly, but we do have a storage room under what used to be and enclosed porch and is now our entryway.  It is quite a bit cooler than the rest of the house, but doesn't freeze, and it has no windows.    This year we are trying storing a box of apples and a box of winter squash.  We wrapped the squash and apples in paper to avoid spreading of spoilage then carefully placed them in boxes.  Here I should mention that a good portion of the squash were an acorn variety that came up as a "volunteer" in our compost pile.  I love those little presents from mother nature.

I also do a small amount of freezing for the winter.  The reason that the ammount is small is that I tend to forget about the food that I have frozen for some reason, and in the many cases, such as tomatoes or soup, it takes too long to thaw them.  But this year I froze a few things, such as the potatoes and green beans I mentioned before, and today I froze some more potatoes, this time with bacon.  Without fail, however, I always sock away a gallon freezer bag full of frozen sweet peppers. 

Frozen Sweet Peppers

1)  Wash, seed and slice the peppers.
2)  Place about 1/4 to 1/2 a cup of sliced peppers in a sandwich bag, remove the air and seal.
3)  Place all of the sandwich bags into a gallon freezer bag and freeze.

These keep very nicely all year, and are very usefull for adding to stir fries, pizzas, cheesesteaks, omlets, etc.  The flavor is a little stronger in the frozen peppers, so you may not want to use as many as you would fresh.  They are also much cheaper than buying fresh in the middle of winter.

This year I also did this with onions. 

Friday, October 15, 2010

Fall Getaway

I am winding down the canning season, at least the water-bathing.  I have a half-bushel of apples left to turn into applesauce tomorrow, and then I think I will begin packing up.  For one thing, the harvest is nearly over, with only a few squash left at the local farmers' markets.  Also, my larder is stocked to overflowing!  I may get ambitious and try to take a full inventory of all that I have done, but here is at least a partial list:

2 bushels of peaches, canned sliced in medium syrup
peach/jalepeno jam
peach jam
grape jelly
grape syrup (see above)
20 pints of salsa
stewed tomatoes
tomato soup (lots)
applesauce (tons)
red onion relish
sweet onion relish
bread and butter pickles
roasted red pepper spread
green beans
cubed butternut squash
chunked pineapple
spiced fruit compote
spiced peaches
peach syrup (leftover from the spiced peaches)

After having a well stocked pantry, the next topic in my guide to How to Survive the Winter is the Fall Getaway.  I find that this helps my morale immensely.  We go to Chincoteague every fall to watch some of the fall migration of waterfowl, to eat the delicious local harvest (crab, oysters, and fresh fish), and to just relax.  Our other family vacations tend to be more frenzied, in a do everything/see everything kind of way, but there is a comfort in our fall vacation.  We return to the same small town, stay in the same hotel (often the same room), and do the same sort of activities every year.  I return refreshed and ready to face the winter.

Thursday, October 7, 2010

That's Right. I Said Jelly

I have a reputation as a good cook, and a crafty person, but not everything always goes well for me.  I  have always had trouble with jellies and jams setting properly.  This year, before last sunday, I had made:

3 batches of runny Peach Jalepeno Jam
1 batch of runny regular Peach Jam
1 batch of super gummy Grape Jelly
1 batch of Grape Syrup (supposed to have been Jelly-which I had processed twice, with a new package of pectin each time).

On Saturday George took me to the Franklin Applefest, and bought me a fresh load of produce including 2 fresh batches of grapes.  So once again with some trepidation I set out to make Jelly.  I am pretty sure that the problem with the syrup is that I forgot to boil the juice and pectin before I added the sugar.  And I am happy to report that I was successful and now have a pantry full of 3 types of grape jelly, Mixed Grape (3 colors)  Concord Grape, and Grape Apple (which I made by re-cooking the pulp from the first two batches with the apple cores from the 18 pints of applesauce that I also made that day).  I still don't know what my Jam problem is, but I am more confident that I can make grape jelly.

Also I made more soup and applesauce.  And I began my venture into pressure canning with green beans.

But that is another post...

Thursday, September 30, 2010

Applesauce and Comfort Foods

The weather has made a turn for the cooler this week.  School is in full swing, both for my kids at home and for the students who help me keep the lab running.  All three of my "work kids"  are stressed with lots of tests in their courses this week, so I decided to do something special for them.  In the form of:

Soft Pumpkin Cookies

2 1/2 cups all-purpose flour
1 teaspoon baking soda
1 teaspoon baking powder
1 teaspoon ground cinnamon
1/2 teaspoon ground cloves
1/2 teaspoon salt
1 1/2 cups granulated sugar
1/2 cup butter flavored crisco
1 cup canned pumpkin
1 large egg
1 teaspoon vanilla extract

Combine the dry ingredients in one bowl, beat the wet ingredients together one at a time starting with the shortening and sugar.   Add the wet ingredients to the dry.  Drop by spoonsful onto greased cookie sheet.  Bake 15 min at 350F.  Cool on cookie sheet, glaze as follows:  1 c powdered sugar, 1 T butter, 2T milk.  Beat together and drizzle over cooled cookies.

In an adrenaline fueld frenzy last night a made a double batch of these and brought a dozen each in for the students, with 3 dozen left for the family.

This week I also started my fall/winter practice of making the meals ahead of time for the kids to shove in the oven before I get home from work.  I also find that cooking ahead reduces my stress from that most hated question "What's for dinner?"

The Rest of My Week in Cooking


On Monday I went to the store and stocked up on pasta and grated cheese.  I made Rigatoni (pasta, browned ground beef, bottled spaghetti sauce, cottage and mozzerella cheeses) for Monday's dinner and while the water was still hot boiled some medium shells and fixed a quick cheese sauce from grated cheese, milk, flour and salt cooked on the stove until the cheese is melted and the sauce is thickened.  Combine the shells with the sauce, pour into a greased pie pan, and Wednesday's Homemade Macaroni and Cheese dinner is in the fridge. 

Also during the cooking I made some Beef Stew for Tuesday's dinner:  I browned some stew meat then deglazed the pan with some red wine.  Put the meat and deglaze in a fridge container with some peeled carrots, potatoes, turnips, and onions.  Sprinkle the whole thing with seasoned salt.  Tuesday morning before work, dump the whole container into the crock pot and add some boullion and water.  By Tuesday evening you will have beef stew hot and ready to go.  I added a loaf of Pilsbury french bread and dinner was done. 

So that's 3 meals in the time it takes to cook one, and half the dirty dishes.  On Tuesday I used the time I would spend cooking to make 9 pints of applesauce. (recipe-such as it is-below).  On Wednesday, I stopped in the store again and grabbed some Tortillas and Enchilada Sauce. 

To make the Enchiladas I browned some ground beef, then mixed in some homemade salsa, refried beans, taco seasoning and grated colby jack.  Then just wrap the filling with a tortilla dipped in enchilada sauce and place in a baking dish lined with more sauce.  Sprinkle with more cheese, and Thursday's dinner is in the fridge. 

Both the Mac and Cheese and Enchiladas cook at 350 from their cooled state for about 40 min to 1/2 hour.  I made the enchiladas while the cookies were baking, saving time there. 
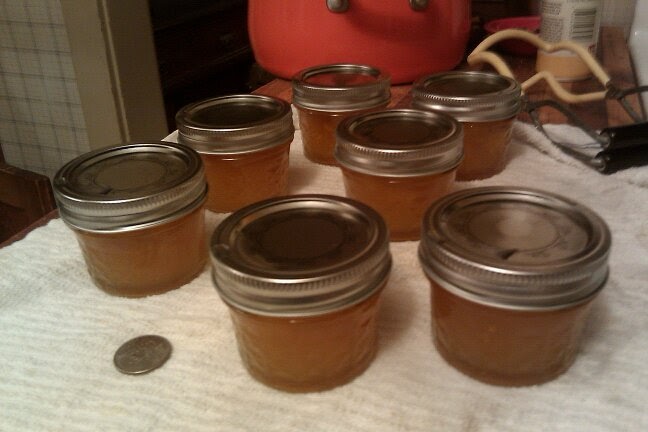
Applesauce

I haven't mentioned applesauce before, but believe me, it has been there.  Since early September we have been buying all the local apples we can get our hands on and I have been making sauce every chance I get.
George and the girls love fresh apples, but I love sauce more.  This is absolutely the easiest thing I put up.  I can make a small batch of sauce (3 pints) in about 30 minutes or a large batch (10 pints) in about 45.  This does not include processing time, but does include cooking time, during which I am usually folding laundry.

Applesauce is best made from a mixture of apples.  I core and slice the apples using that gadget thingy, but I don't peel them. Then I add a tiny bit of water, just enough, to keep them from sticking and cook until tender.  Then I run them through a food mill and add a little brown sugar to lightly sweeten.  Pour hot into hot jars and process 15 minutes for pints or 20 minutes for quarts. 

So far I have done maybe 30 pints or so.  And I am nowhere near done.  Melissa can live for days on applesauce alone.

Tuesday, September 21, 2010

Relishes, Jellies and Sauces

Ok, I confess.  I am still canning.  This morning I panicked that the season is getting to be over and I went out and bought 11 more cases of jars.  I have invested in a pressure canner to can soups, but I have not done any of that yet.  I am still in experimental mode for waterbathing and I am having a ball! 

Jalepeno Jelly

The star of this year's canning show has to be the peach jalepeno jelly.  I may have mentioned that I can't make a good jelly to save my life, and this is no exception.  But everyone loves it poured over some cream cheese and spread on a cracker in all it's runny glory.  The recipe is easy, I just follow the sure jell recipe for peach jam, but I add about 6 chopped jalepeno peppers to the peaches and process as normal.  I can't promise that yours will be as runny as mine, but there it is.

Golden Sweet Onion Relish

I love sweet pennsylvania onions, but they are only around for a short time.  This recipe is pretty to look at with its golden color and the little bits of red and green pepper  (this year I used one that had a little of both colors in it).  And the onion still retains a little crunch.  I am thinking you could mix this with sour cream and use it as a dip or a potato topper, or again with cream cheese on crackers.  Or it would be great on hot dogs or burgers.

5 pounds sweet onions, diced
1 red/green  bell pepper, diced
1/4 cup kosher salt or canning salt
1 cup granulated sugar
1 cup light brown sugar, packed
1/2 teaspoon ground turmeric
2 cups vinegar
1 t pickling spices
1 T salt

Combine the onions, pepper and salt.  Sit 30 min to allow moisture to come out of veggies, then drain. 
Combine all ingredients in a dutch oven  and bring to a boil.  Reduce heat and simmer until thick, about 1/2 hour.  Process 10 minutes.

Carmelized Red Onion Relish

This one is really over the top.  It will be great on salads, or over steak, or on a really good burger.  It kind of has a Worchestershire taste to it, but sweeter and with some cruch.  A couple of years ago George bought some Merlot wine which the vintner insisted was only good for cooking.  He had intended to drink it anyway, but now 4 years later it is still in the wine rack, so I commondeered it for this recipe.

5 large red onions, peeled
3/4 cup firmly packed brown sugar
2 2/1 cup dry red wine
1/2 c balsamic vinegar
1 T salt
1/2 t pepper

I took a tip from Alton Brown and cooked this in my big electric skillet.  Slice onions into very thin slices. Combine onions and sugar in a heavy non-stick skillet. Cook, uncovered, over medium-high heat for about 25 minutes or until onions turn golden and start to caramelize, stirring frequently.Stir in wine and vinegar. Bring to a boil over high heat, reduce heat to low and cook for about 15 minutes or until most of the liquid has evaporated, stirring frequently. Season to taste with salt and pepper.  Process half an quarter pints ten minutes.

New Potatoes and Green Beans

Ok, this was a favorite at my house when I was growing up.  I made it for my family early this summer and they, or at least those who are not horribly picky eaters, loved it.  But really, most of the summer is too hot in my house to have this on a regular basis.  So my plan is to freeze the potatoes and green beans and then make the cream sauce this winter.  I have washed and cut the new potatoes to size, then par cooked and drained them.  Then I spread them out on wax paper lined cookie sheets.  I blanched the green beans for 3 minutes, drained them well, then spread them out on top of the potatoes.  I put the cookie sheets in the chest freezer until everything is frozen solid, then I will pack it into freezer bags.  I don't have the cream sauce exactly straight in my head, but it's really just butter, milk, flour and salt.

Tuesday, August 31, 2010

I am deeply into canning season now.  Saturday I did half a bushel of peaches, including Spiced Fruit Compote with cinnamon and cloves.  I think this will be great in the middle of winter served warm, maybe thickened a little and with a few dried cherries added.

Spiced Fruit Compote

5 lb Peaches, peeled an coarsely chopped 
2 fresh Pineapples peeled cored, an coarsely chopped
2 t cinnamon
1t ground cloves
2 c sugar
3 c water

Make the syrup then add fruit and cook until warm throughout.  Process in pints 15 min.

I also tried bread and butter pickles and made some more soup.  I just used a mix for the bread and butter pickles, because I'm not entirely sure they will get eaten.  We will see.

Sunday I tried to continue my canning Bacchanalia, but I got busy and all I got done was some pineapple, which was new, but why not?  Oh and I also made some Refrigerator Dill Pickles.  These are the second batch that I have made this year, and the first one was great.  About a month ago I found myself in an emergency pickle making situation (don't ask) and found that I was out of pickling spices.  However, I had some mulling spices and I substituted them.  The result was awesome!  Here is the recipe I used:

Refrigerator Dill Pickles

12 3 to 4 inch long pickling cucumbers
2 cups water
1 3/4 cups white vinegar
1 1/2 cups chopped fresh dill weed
1/2 cup white sugar
8 cloves garlic, chopped
3 tablespoons coarse salt
1 tablespoon pickling spice or mulling spice or a mixture of both
4 sprigs fresh dill weed


In a large bowl, combine the cucumbers, water, vinegar, chopped dill, sugar, garlic, salt, and spices. Stir, and let stand at room temperature for 2 hours, until the sugar and salt dissolve.  Remove the cucumbers to three 1 1/2 pint wide mouth jars, placing 4 cucumbers into each jar. Ladle in the liquid from the bowl to cover. Place a sprig of fresh dill into each jar, and seal with lids. Refrigerate for 10 days before eating.  

So otherwise I have just been making more and more soup, and keeping up with the second bushel of peaches I bought.  Tonight I may try again to make jelly, which is another story....maybe tomorrow I will post on that one.

Friday, August 27, 2010

Horseradish Dissapointment

Tonight I tried to harvest the horseradish we inherited from my Dad last spring.  The patch had grown to about 2 feet sqare and about 4 feet tall.  I had visions of 3 or 4 half pint jars processed and put up for the winter.  I dug up all the plants and all the root system I got was about the equivilent of 3 carrots.  So I dutifully ground it up in the food processor with a little vinegar and got a little over a half pint and just stuck it in the fridge.  Also it seems to be a little woody.  I guess I need to research better when to harvest.  I re-planted about 1/3 of the roots, so I will try again next year.

Thursday, August 26, 2010

Easy Meatloaf and Spicy Green Beans

Most of those who know me know that I am really a "From Scratch" kind of girl, but this meatloaf is more "Semi-Homemade"  because I use the stovetop stuffing mix.  Really, it has all the seasonings I would add, it's just faster.  I mixed this up this morning and the kids will pop it into the oven at some point.  Hopefully.
I am also adding the Spicy Green Bean dish, but beware: it may ruin you for canned green beans forever!

Easy Meatloaf

1 lb. local ground beef
1 pkg stovetop stuffing mix
1 egg
1T worchestershire sauce
2/3 c milk

Place everything in a bowl.  Allow the milk to soak into the stuffing mix for a couple of minutes.  Mix the whole thing with your hands and pop it into a greased loaf pan.  Bake at 375 for about an hour, then top with "Special Sauce"  (equal parts of ketchup, mustard and brown sugar) and bake for 15 minutes more. 

Spicy Green Beans

3/4 pound fresh green beans, trimmed
2 tablespoons soy sauce
1 clove garlic, minced
1 teaspoon chili sauce (I like Sriracha)
1 T honey
 
I like to mix up a bunch of the sauce ahead of time and keep it in the fridge.  I have tried freezing this and it doesn't work well, but the sauce keeps for a couple weeks and I can usuallly find fresh green beans except in the dead of winter.
Saute the green beans in a couple of teaspoons of oil until the color becomes vibrant, then add the sauce and steam until they are just tender.

Wednesday, August 25, 2010

Heirloom Tomato Soup

This year George planted at least 5 different types of heirloom tomatoes. He started in April with seeds.  He babied them along, protected them from cats, frost, wilt, heat, and the dreaded blight.  Now in late August they are all ready to harvest at the same time.  He lovingly slices them, rereads their descriptions in the seed catalog, then we have tastings as if they were wine.  I am getting a little sick of tomatoes.
But Lo!  Canning Season is upon us!   I wanted to do something special with his precious tomatoes, so when he went on a business trip, I set to looking for a recipe.  This is what I came up with:

Heirloom Tomato Soup

6 qts. ripe tomatoes -heirloom including Cherokee Purple, Mountain Princess
1 sweet onion, diced
1 stalk celery
1/4 c fresh parsley
4 Tb. flour
3 Tb. salt
8 Tb. sugar


Cut the tomatoes into wedges and cook all ingredients until celery is tender (about 1 hour).  Run the whole thing through a food mill, then return to boiling and pack hot into hot jars.  Process 45 minutes in a boiling water bath.

About Me

Every fall I get very introspective and philosiphic.  The kids ages are marked by their return to school.  The harvest is upon us.  For me it is the real time of endings and beginnings.  I go into full nesting mode.  A few years ago I started to write a book for my children called "How to Survive the Winter".  It is really just a journal of recipes and lists of useful information that I think they are probably too busy to pay attention to now, but maybe someday they will want to know. 
Today I realized I had some new recipes to add to the book as I do every year, but I can't find it.  It is an orange composition book and it clearly says the title on the cover.  If you find it please let me know.
My friend Pierre once told me that he wonders when someone decides that they are interesting enough to blog.  My answer to that is that I don't know.  I have decided to blog because I can't find my book.  I don't care who reads it.